Skip to content
LJK Electrical Supply Mart

LJK Electrical Supply Mart

Month: January 2024

How to Building Custom Electrical Panel

Posted on January 12, 2024January 16, 2026 By kijoe31 1 Comment on How to Building Custom Electrical Panel
How to Building Custom Electrical Panel

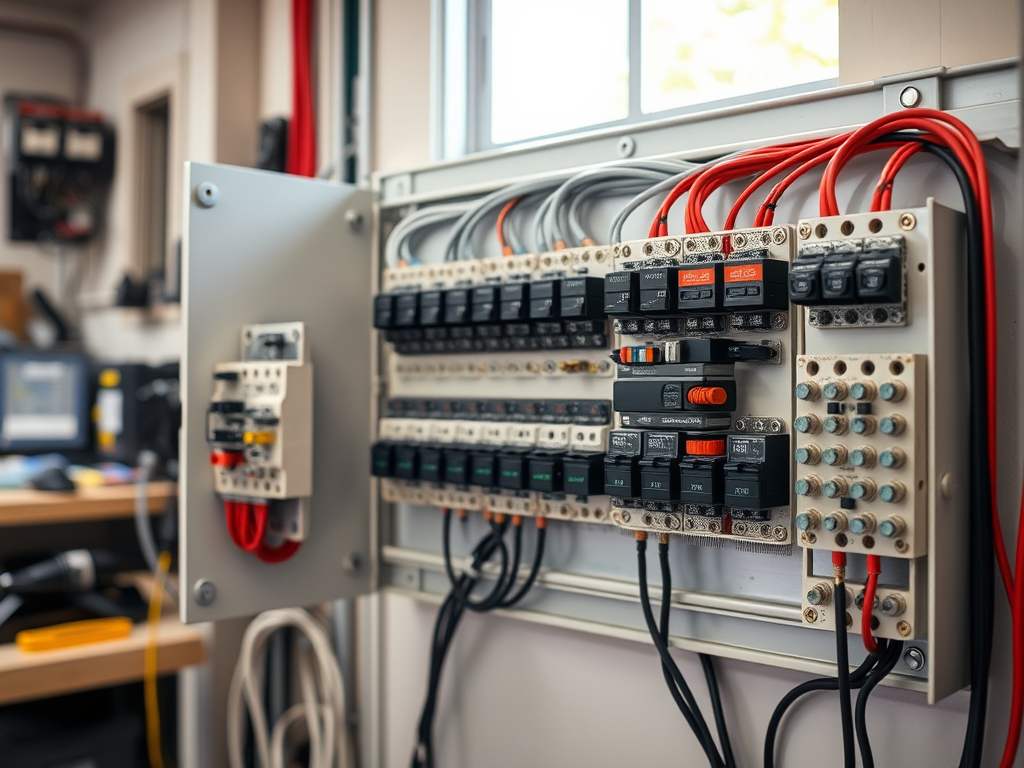
Building a custom electrical panel is a practical and valuable skill used in industrial automation, commercial buildings, workshops, and specialized machinery. A properly designed panel improves safety, reliability, and long-term maintainability. This guide walks through the full process of planning, building, wiring, and commissioning a custom electrical panel, even if you are starting from scratch….

Read More “How to Building Custom Electrical Panel” »

Blog
Electrical Crimper An electrical crimper is a must-have tool for DIYers and electricians alike. It securely attaches connectors to electrical wires, creating strong, reliable connections without soldering. Using the right crimper improves safety, reduces resistance, and helps prevent loose connections that can cause overheating or failure. View Crimpers & DIY Guides

Battery Power Electrician Crimps

When working with battery power systems, proper crimping techniques are crucial for ensuring secure and reliable electrical connections. Below is a guide to battery power electrician crimps, including tools, materials, and best practices.

Tools Needed

  • Crimping Tool: Select a high-quality crimping tool designed for the gauge of wire you are using.
  • Wire Stripper: This tool will help you strip the insulation off the wire ends properly.
  • Heat Shrink Tubing: For added insulation and protection after crimping.
  • Multimeter: To check connections for continuity.

Materials Required

  • Copper Connectors: Depending on your application, choose the appropriate type (ring terminals, spade connectors, etc.).
  • Battery Cable: Select the appropriate gauge that matches your battery’s output requirements.
  • Insulation Material: This could be heat shrink or electrical tape for securing the connections.

Steps for Crimping

  1. Strip the Wire: Use the wire stripper to remove approximately 1/4 inch of insulation from the end of the wire.
  2. Select the Right Connector: Choose a connector that fits snugly over the stripped wire. Ensure it’s compatible with your wire gauge.
  3. Insert the Wire: Place the stripped end of the wire into the connector, ensuring that it reaches the crimping area.
  4. Crimp the Connector: Align the connector in the crimping tool and squeeze the handles firmly to make a secure connection.
  5. Inspect the Crimp: Ensure that the wire is tightly secured within the connector and that there is no movement.
  6. Apply Insulation: If using heat shrink tubing, slide it over the crimped connection and use a heat source to shrink it. Alternatively, use electrical tape to insulate the connection.

Best Practices

  • Use the Correct Gauge: Always match the wire gauge to the amperage requirements of the circuit to avoid overheating.
  • Check Connections: After crimping, use a multimeter to check for continuity.
  • Maintain Tools: Keep your crimping tools clean and maintained for optimal performance.
  • Follow Safety Protocols: Always wear safety glasses and work in a well-ventilated area when working with electrical components.

Conclusion

Proper crimping techniques are vital for anyone working with battery power electrical systems. Following the guidelines above will help ensure reliable connections and the safe operation of your electrical projects.

Recent Posts

  • How to Building Custom Electrical Panel

Recent Comments

  1. Zakazat_fypi on How to Building Custom Electrical Panel

Archives

  • January 2024

Categories

  • Blog
  • How to Building Custom Electrical Panel

Copyright © 2026 LJK Electrical Supply Mart.

Powered by PressBook WordPress theme